Well, I am way overdue for my monthly update! Sorry about that. Since so much has happened in the art room since my last entry, I am going to split this update into the three grades starting with the 8th grade!
Thumbprint Printmaking:
For this project I took each of the 8th grade students' thumbprints and then magnified them on the copy machine. The students then traced the lines and carved them into linoleum blocks. Next, they chose colored paper and make prints with various colors of ink.
It was a quick easy project that utilized multiple elements and principles of design: line, texture, unity, pattern, movement. Plus, it was kind of like doing self-portraits because each thumbprint is different!


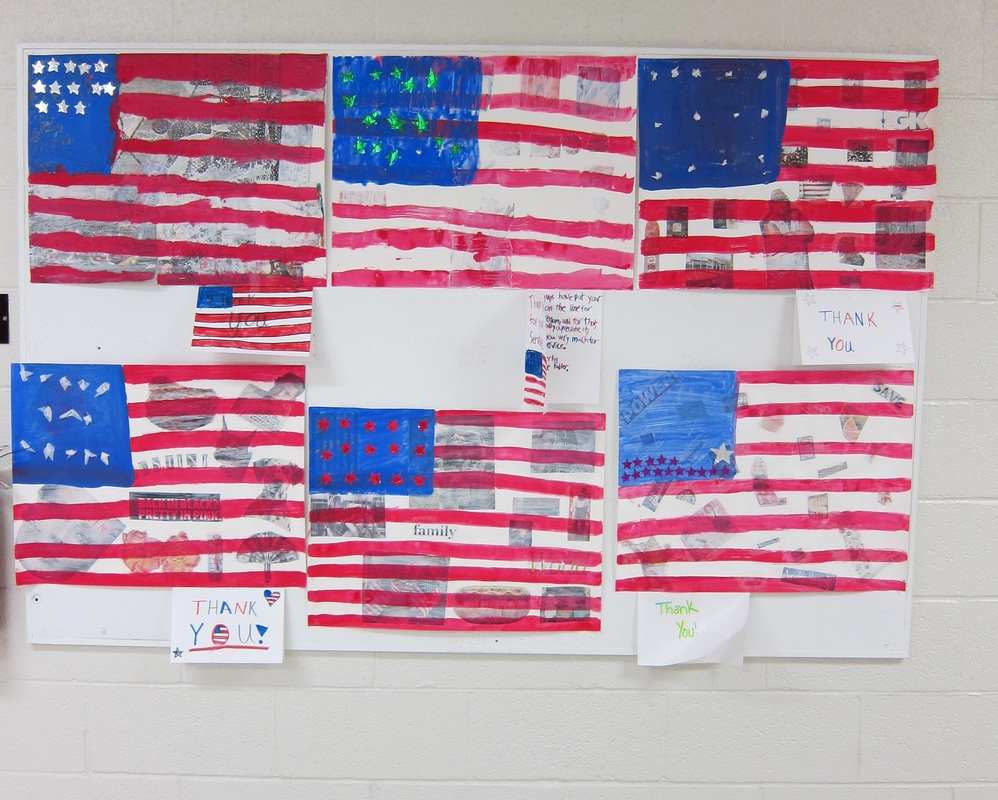
Personalized Flag Collages:
The 8th grade really loved this particular project. We talked about freedom and what it means to be an U.S. citizen. Then they looked through magazines and cut out images that reminded them of freedom or of things they are interested in (since they are Americans). After they collaged these magazine cutouts onto poster-paper, they painted thin layers of paint over-top for the stripes of their flag. I had them also use metallic or tissue paper to add stars (I encouraged them to use their own age as the number of stars). It was really interesting to see their finished personalized flags...resembling how they view freedom and what it means to be an American.
The students also wrote Thank You letters to our Veteran's and I hung these up during the week of Veteran's Day and for our assembly. Thank You to all that have served to give us the freedom we enjoy today!


Culture Unit
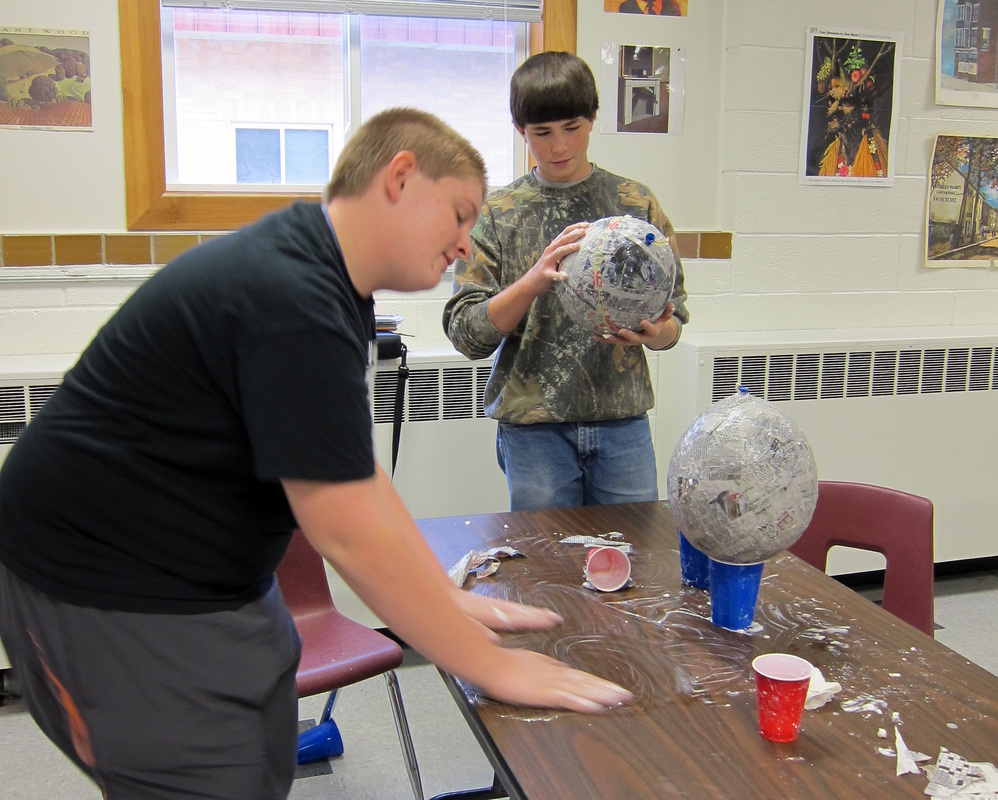
African Tribal Masks:
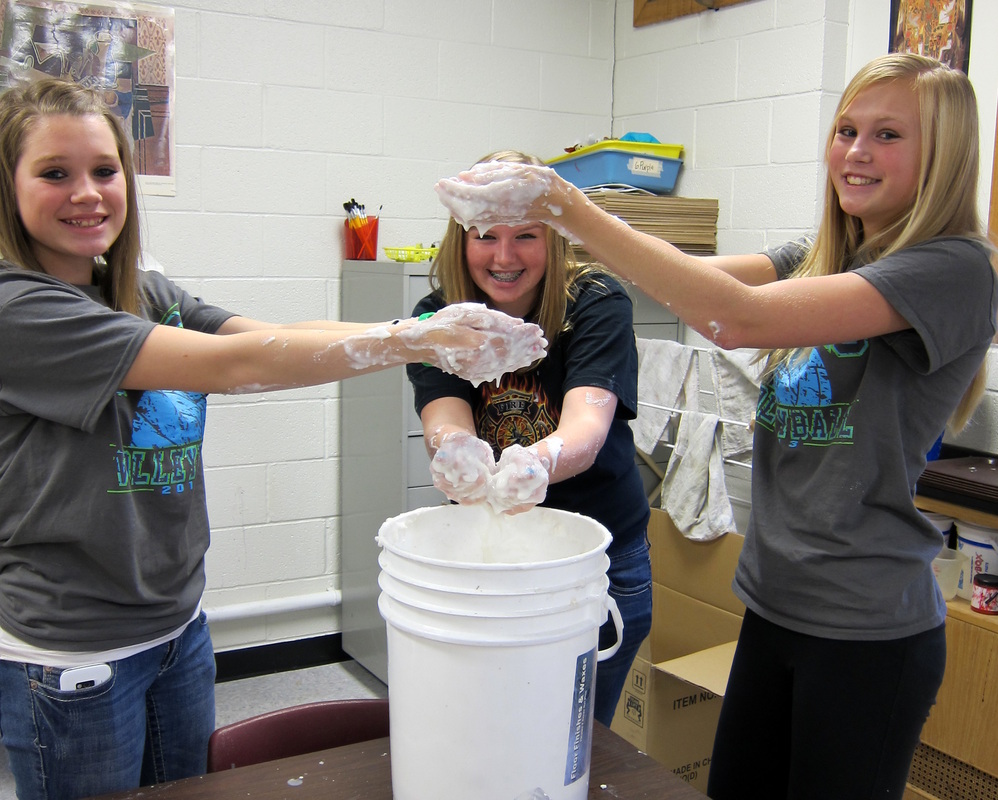
The messier...the more fun it is, and this project was definitely messy! Around the week of Halloween, the 8th graders learned about African masks and a little about their culture. (They did some activities with http://www.artyfactory.com/ if you're interested.)
They worked in pairs to cover a balloon in paper mache until it was thick enough to keep it's shape. I popped the balloons and they cut them in half. Then the students added on 3-D face shapes, hair (yarn), and painted it with symbols and colors. The goal was to use symmetry in their design with an African influence...meaning all of the things they added to their masks had to be symbolic to "them." I'm not sure they quite understood the meaning of symbols though, so we touched on it again for the next project.
These pictures are so fun!:
African Tribal Masks:
The messier...the more fun it is, and this project was definitely messy! Around the week of Halloween, the 8th graders learned about African masks and a little about their culture. (They did some activities with http://www.artyfactory.com/ if you're interested.)
They worked in pairs to cover a balloon in paper mache until it was thick enough to keep it's shape. I popped the balloons and they cut them in half. Then the students added on 3-D face shapes, hair (yarn), and painted it with symbols and colors. The goal was to use symmetry in their design with an African influence...meaning all of the things they added to their masks had to be symbolic to "them." I'm not sure they quite understood the meaning of symbols though, so we touched on it again for the next project.
These pictures are so fun!:


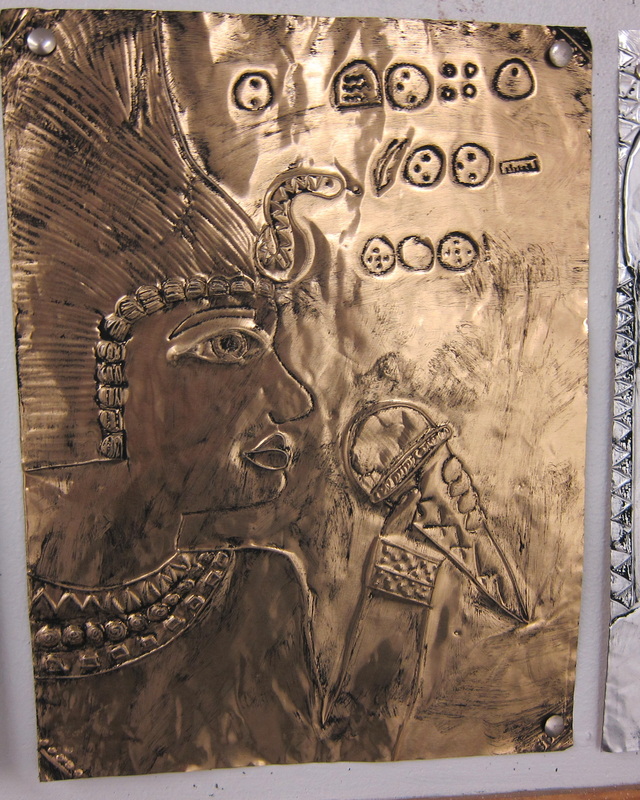
Ancient Egyptian Art: Metal Tooling
Students learned a bit about the characteristics of Ancient Egyptian Art: such as profile vs. frontal view, hierarchy of scale, their multiples gods, and the hieroglyphics that decorated the walls of tombs, temples, and palaces.
First the students looked at hieroglyphics and practiced drawing these. Then I had the students create "cryptograms", or symbols, for each letter of the alphabet...similar to hieroglyphics. We discussed again what symbols are and how they work as an art form. The students then wrote little secret messages in their new pictorial writing system that they traded to decode.
Next, I showed the students how to draw a profile view of a face to make an Egyptian-style portrait. They had to add jewelry and a crown similar to Ancient Egyptian Art, and depict the person holding an object that represented their own interests. They also had to fill the extra space with hieroglyphic messages. Resembling the wall paintings or carving of Ancient Egyptian Art, the students learned the technique of "metal tooling." They basically took their sketch on paper and traced firmly onto the thin metal sheet, indenting it with their design. Then they worked to make certain areas of the design pop out and finished it off by painting on black paint and wiping off the excess to give it an "antique" look. We love how these turned out!